JoeWhitehead.co.uk
Welcome to another of my blog articles.
Article Number: #102 Posted By: JOE
Easy DIY Gel Holders
|
A lot of photographers, old, and new have will have at some point used or thought of using gels as a creative add on to normal flash photography. Apart from the creative aspects of gels, which allow the photographer to explore different moods and atmospheres when composing a shot. There is also a one major drawback, comprising of a few different elements. The flash gels are small, flimsy and easily damaged if not properly handled and stored. This makes using gels less appealing to photographers, especially those new to the subject. camera and flash manufactures have attempted to remedy this disadvantage, but unfortunately only one has come close to solving it (Nikon). However, unless you want to shell out £800+ on a creative flash system (which still has the handling issues until properly mounted) i wouldn't bother at all. There is still one solution... My DIY gel holders. |
|
 |
 |
|
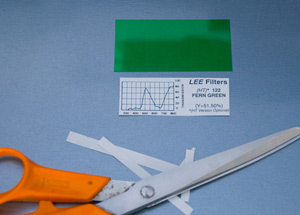
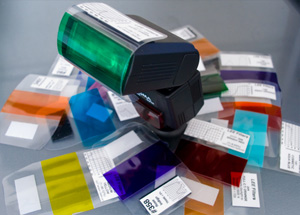
For these gel holders your going to need some gel filters. There are two companies that provide very good gel filters for use in theater and photography. Rosco is the first, you can pick up a sample pack aimed at photographers in many places. Purchase Rosco Gels. Lee is the second manufacture, however they do not provide any sample pack. you may be able to fine Lee filters on eBay, sold in filter swatch books. Which ever filter you go for, both have the same layout. The gel itself along with a data sheet. Both are needed for this tutorial, but if you can leave the data sheet if you don't require it or don't have it to hand.
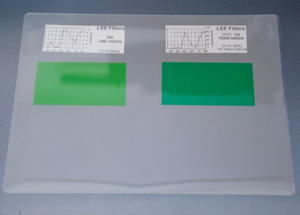
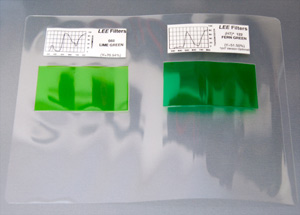
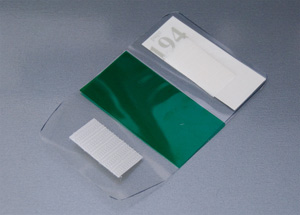
Download gel holder template Firstly as illustrated above, get the colour gel you want to make the holder for. Next get the corresponding data sheet and cut it to size, slightly smaller than the gel itself is fine. Next position the gel in a lamination pouch (i only had A5 sheets, so i could fit 2 gels in at anyone time) Make sure the spacing between the gel and the data sheet is about 1cm - 1.5cm, this is to ensure the correct spacing for mounting on the flash gun. (alternatively, you can use the template PDF to get the correct spacing.) |
|
 |
 |
|
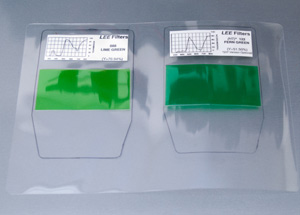
Now you will need the gel template, if you haven't already used it for the first step. Place the fresh laminated gels over the printed PDF template and align the gel with the template. Mark around the gels using a permanent marker to outline each individual get holder. You should end up with something similar to the above right hand image. No its time to cut your new gel holder out. you should the end up with a single gel in its own gel holder. I sometime use a nail file to round off the corners as lamination plastic can be very sharp. |
|
 |
 |

|
Once complete, you now need to cut two pieces Velcro about 4cm in length. Next position these pieces according to the template (make sure you place the spiky side on the gel, as the fluffy side is mounted on the flash....Your new rugged and easy to handle gel holder is now complete. The final step is to place the fluffy side of to lengths of Velcro onto the head of the flash. For correct alignment. Leave the fluffy side attached to one of the gel holders, and remove the backing paper to reveal the adhesive. Take the gel holder and place it so the gel covers the lens of the flash. Now carefully fold the top over onto the flash head whilst still holding the gel firmly in place over the lens. Repeat this step for the bottom and that it. the gel will be attached. Once complete the gel can be removed at will, and another gel put on in seconds instead of minuets. the gels are also a lot tougher and more robust due to the lamination step. I sometimes take out a handful with me, which are kept in a pocket, if i need to swap and change between shots its a simple and very quick process. (i even stick the one i replaced to my fleece if I'm in a rush, it'll happily stay there until i next use it. |
|
Disclaimer |
|
|
Just before anyone points this out. I am fully aware that the lamination stage of this gel holder will indeed alter the light properties of the gel, however, most photographers use gels as a creative means to produce stunning effects for visual enrichment. Personally i couldn't care less if the light is altered by a fractional amount, it will still produces a the colour you choose, and that's all that matters... be creative. I also hold no responsibility for damage caused to any equipment as a result either directly or indirectly following this tutorial. The person following this tutorial must accept all responsibility for his or her own safety and that of their equipment. JoeWhitehead.co.uk or JoeWhiteheadPhotograhpy.co.uk is in responsible. |
|
Reader Comments
Please Feel free to leave a comment...
For security reasons, all comments are vetted prior to publication.
This unfortunity (for now) means a small delay before you see your comment.
If you are a regular poster,
you will see your comments posted instantly, as our automatic verification script can authenticate your post.
Posted by: Nevery Date: 2013-07-14
Wow! I'm surprised that no one has commented, so I figured I would. Thank you for the awesome tip. I've only used a few of my gels and they are already crumpled and damaged. I'm definitely doing this tomorrow. I love that it's not only an awesome idea but it protects the gels, too. This and a DIY honi speed strap is the solution I've been looking for.thank you so much!